
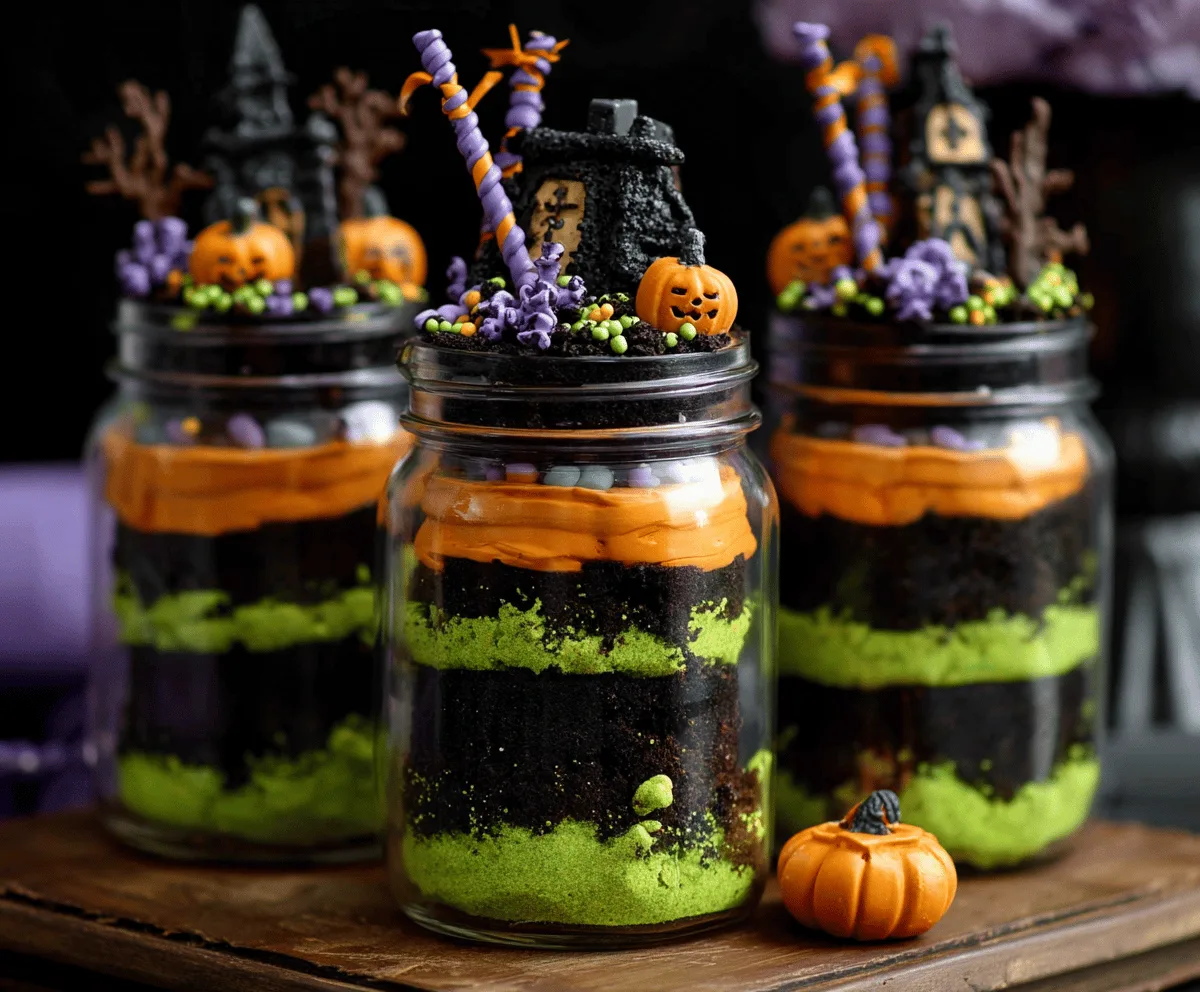
Witches’ Brew Halloween Cake Jars are a fun and spooky treat perfect for Halloween parties or just a festive weekend dessert. Imagine layers of moist chocolate cake, creamy frosting, and colorful Halloween-themed sprinkles all packed into a cute little jar. These jars not only look adorable with their eerie decorations but also offer a delicious mix of textures and flavors that everyone loves.
I love making these cake jars because they’re so easy to customize. You can add your favorite cake flavors and frostings or even toss in some gummy worms or candy eyes for a playful touch. Plus, they’re portable, so I can share them with friends without worrying about slicing a whole cake. It’s a simple way to make Halloween extra special without a big mess in the kitchen.
One of my favorite ways to serve these is chilling them in the fridge until party time, then adding a little whipped cream and more sprinkles on top just before serving. Kids and adults both get excited when they see the jars with their spooky labels and colorful layers. It’s a great way to bring festive vibes and tasty smiles to any Halloween gathering!
Key Ingredients & Substitutions
Chocolate Cake: This is the base of the jars, providing a rich flavor and moist texture. You can use a boxed mix for convenience or make your favorite homemade recipe. For a gluten-free option, try a gluten-free chocolate cake mix.
Buttercream Frosting: Divide and color your frosting with green and purple food coloring to create eye-catching layers. If you prefer dairy-free, try coconut cream frosting or store-bought vegan buttercream.
“Dirt” Layer: Crushed Oreo cookies or black cocoa powder add texture and a spooky dark color. Oreo cookies give a crunch, but black cocoa powder is great if you want a smoother texture without extra crumbs.
Fondant Decorations: These add fun shapes like pumpkins and witch hats on top. If you don’t want to work with fondant, use small candies or gummy worms as simple, tasty alternatives.
How Can You Build These Jars Without Making a Mess?
Layering cake and frosting neatly inside a jar can be tricky. Here’s how to keep your layers clean and pretty:
- Use a small spoon or a piping bag to add frosting carefully, avoiding drips on the glass sides.
- Press cake crumbs gently into place without squeezing too hard to keep the layers intact.
- Start with larger cake crumbs at the bottom and use finer crumbs for the “dirt” layers to create contrast.
- Decorate the very top last, piping frosting generously and adding decorations thoughtfully so they don’t fall apart.
- Chill the jars slightly after assembling each layer if you want firmer, cleaner layers before adding the next.
Taking your time and working carefully will make your jars look magical and ready to impress!
Equipment You’ll Need
- 9×13-inch baking pan – I recommend this for baking the cake evenly; makes cutting into layers easier.
- Mixing bowls and spoons – perfect for dividing and coloring your frosting without mess.
- Sharp knife or cake leveler – helps cut the cake into neat layers for stacking.
- Small spatula or butter knife – great for spreading frosting smoothly inside the jars.
- Glass mason jars or clear containers – ideal to show off the colorful layers and decorations.
- Piping bags and tips – makes decorating with frosting neater and more fun.
- Decorating tools (optional) – fondant cutters or small scissors for shaping decorations.
Flavor Variations & Add-Ins
- Use vanilla or red velvet cake instead of chocolate for different flavor twists.
- Swirl in peanut butter or cookie butter into the frosting for extra richness.
- Add gummy worms, spiders, or eyeball candies for more spooky fun.
- Mix in crushed cookies or candies between layers for extra crunch and flavor.
Witches’ Brew Halloween Cake Jars
Ingredients You’ll Need:
For the Cake:
- 1 box chocolate cake mix (or homemade chocolate cake batter)
- Butter or oil for greasing baking pans
For the Frosting:
- 2 cups buttercream frosting, divided
- Green food coloring
- Purple food coloring
For the Decorations & Dirt:
- Black cocoa powder or finely crushed Oreo cookies (for “dirt”)
- Edible Halloween decorations (small sugar pumpkins, candy corns, candy eyeballs, sprinkles, gummy worms)
- Orange and black fondant or modeling chocolate (to shape witch hats, candy sticks, and swirls)
- Small pretzel sticks (optional, for decoration)
Time Needed
This recipe takes about 40 minutes to bake and cool the cake, 15 minutes to prepare the frosting and decorations, 20-30 minutes to assemble the jars, plus at least 1 hour chilling time in the fridge for the layers to set properly.
Step-by-Step Instructions:
1. Bake the Cake:
Prepare your chocolate cake batter according to the package or recipe instructions. Pour it into a greased 9×13-inch pan and bake. Once done, allow it to cool completely before assembling.
2. Prepare the Frosting:
Divide your buttercream frosting into two bowls. Add green food coloring to one bowl until the frosting is a bright, vibrant green. Add purple food coloring to the other bowl and stir until you have a lovely pastel purple color.
3. Prepare “Dirt” and Decorations:
Crush Oreo cookies finely or use black cocoa powder to make a dirt-like crumble. If you’re using fondant or modeling chocolate, form small pumpkins, witch hats, and candy stick shapes to decorate your jars later.
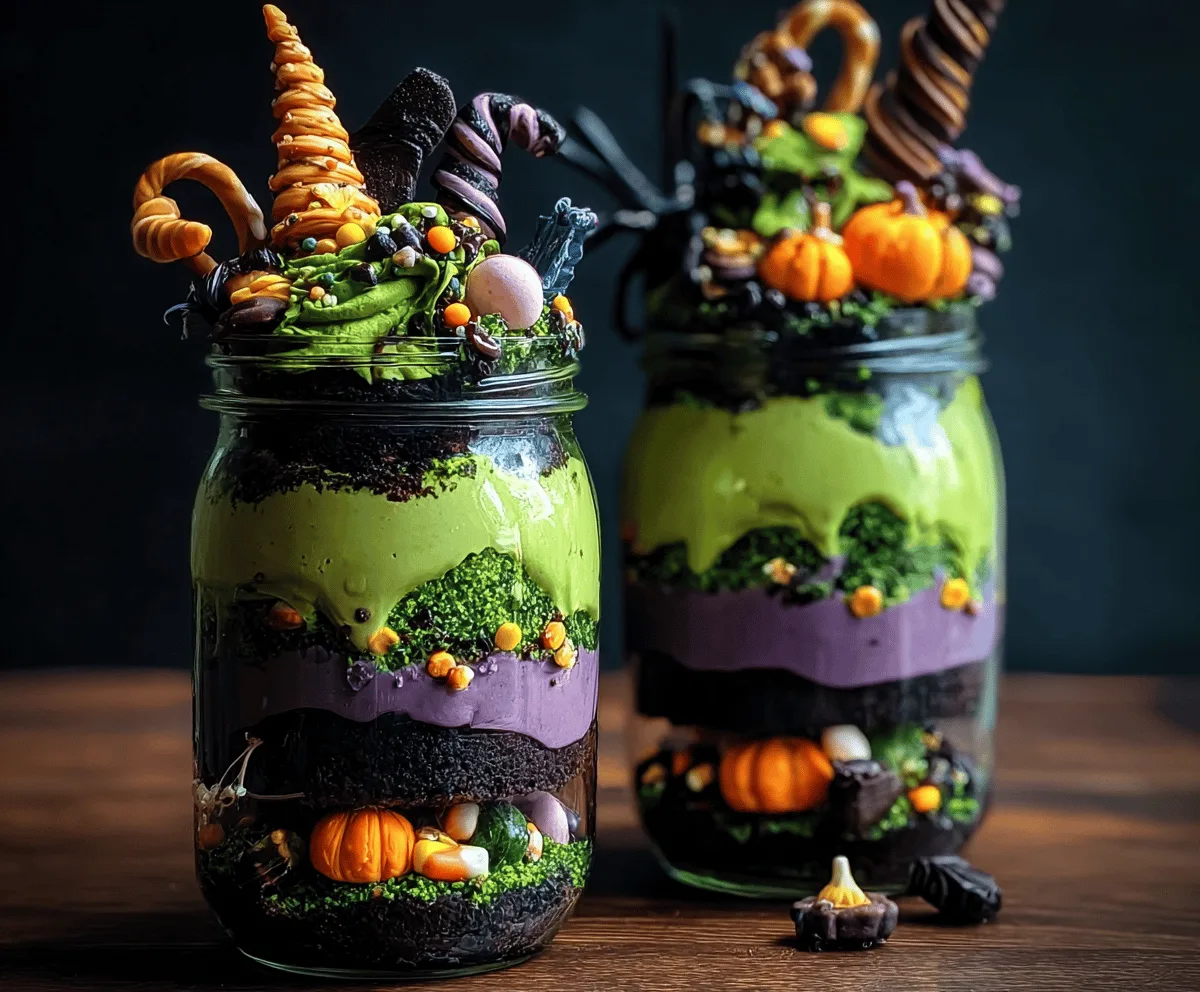
4. Assemble the Jars:
Start by adding a layer of crumbled chocolate cake to the bottom of each clean jar. Add a thin layer of green frosting on top, then sprinkle some Oreo crumbs to simulate dirt. Next, add a layer of purple frosting. If your jars are tall enough, repeat the layers of cake crumbs, green frosting (letting some drip for a fun effect), Oreo crumbs, and purple frosting. Add small edible decorations like candy pumpkins, candy corns, or sprinkles on each layer to make it playful and festive.
5. Top Decoration:
Generously pipe or spread the green frosting on top, then decorate with your handmade fondant witch hats, candy sticks, miniature pumpkins, gummy worms, and Halloween-themed sprinkles. You can add pretzel sticks as whimsical swirls or handles to complete the witches’ brew look.
6. Chill and Serve:
Place the assembled jars in the refrigerator for at least one hour to allow the layers to set and flavors to meld. Once chilled, serve the jars and enjoy your delicious, spooky treat!
Can I Use Homemade Cake Instead of Box Mix?
Absolutely! Homemade chocolate cake works wonderfully and allows you to customize flavors. Just ensure it’s fully cooled before layering to avoid melting the frosting.
How Do I Store These Cake Jars?
Store them in airtight containers or cover the jars with lids and keep them refrigerated. They stay fresh for up to 3 days—just give them a gentle stir before serving if needed.
Can I Make These Ahead of Time?
Yes! You can assemble the jars a day in advance and keep them chilled. Just add any delicate decorations right before serving to keep them looking fresh.
What If I Don’t Have Fondant for Decorations?
No worries! Substitute with small candies, gummy worms, or colorful sprinkles to keep the Halloween vibe fun and festive without extra effort.